
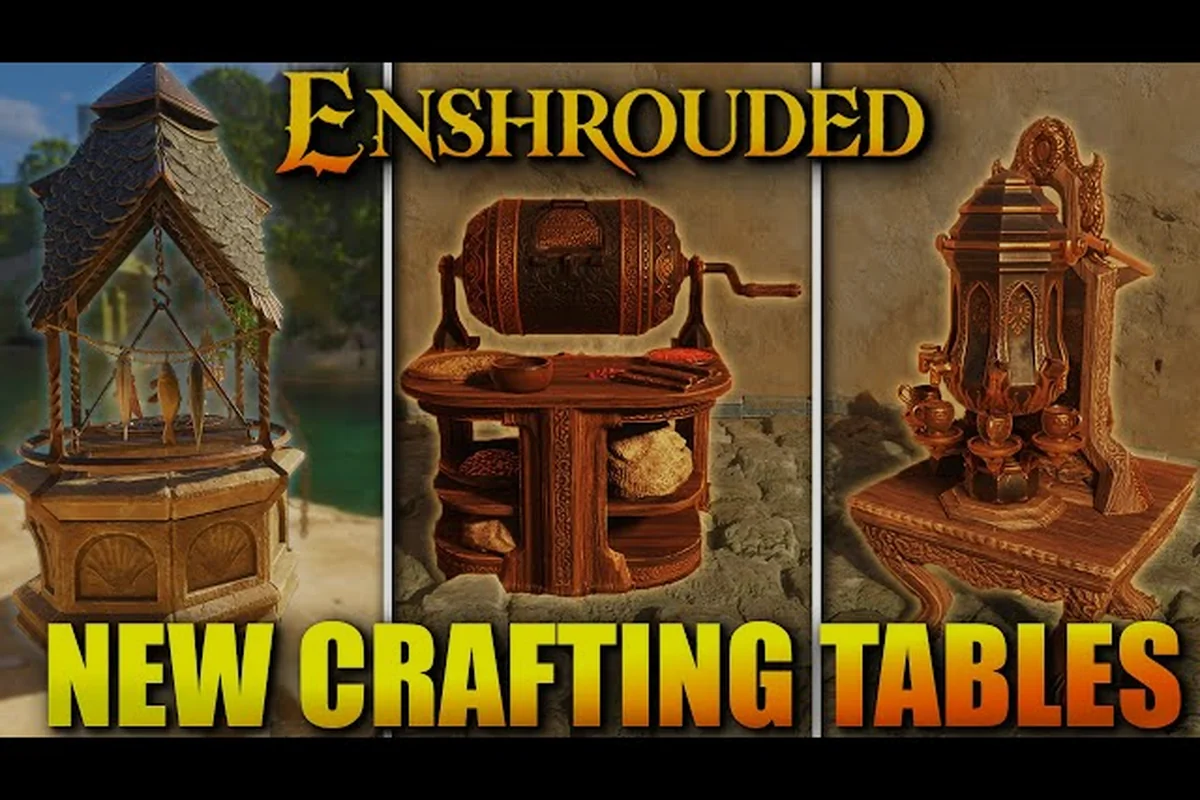
Charcoal is the bottleneck that stalls almost every mid-game build in Embervale, and this Enshrouded kiln guide walks you through fixing it fast. Once the kiln is running, the alchemy station, laboratory, loom and tanning station all become reachable upgrades instead of distant goals.
Why the Kiln Anchors Your Whole Crafting Base
The kiln is the first production station that turns raw wood into a refined fuel, and that single conversion unlocks most of the metalworking chain. Without a steady charcoal supply, your smelter sits idle, your forge can't produce bronze or iron bars, and every weapon upgrade stalls. According to the official Steam page, Enshrouded is a survival action RPG built around base building and survivor rescue, so production stations like this one sit at the center of progression rather than the margins.
Placing the kiln correctly matters more than most players expect. The station needs to sit inside a flame altar's protected radius, and it benefits from being close to your wood storage so you aren't sprinting across the base every few minutes. A compact layout with the kiln, smelter and forge within a few steps of each other cuts downtime dramatically.
Here's what the kiln actually produces and why each output matters: Charcoal is the bottleneck resource that gates your entire metalworking chain — smelting copper, bronze and iron ore all consume it, so a single kiln running at base tier produces roughly enough fuel to keep one smelter fed without stockpiling. Ash accumulates as a byproduct with no extra input cost, making it the cheapest source for fertilizer and the alchemy recipes tied to your laboratory station. The refined wood products feed directly into later stations like the loom and spinning wheel, so the kiln effectively doubles as the entry point for your textile and tanning progression, not just fuel.
-
Charcoal — the core fuel for smelting copper, bronze and iron ore into usable bars
-
Ash — a secondary byproduct used in fertilizer and several alchemy recipes
-
Refined wood products — intermediate materials that feed later crafting stations
The kiln also scales with your base tier. Upgrading the flame altar level raises the station's crafting speed and unlocks higher-tier recipes, so revisiting it after each altar upgrade is worth the trip. Players who treat the kiln as a one-time craft usually find themselves rebuilding it later anyway.
If you're still sorting out your first base layout, the beginner progression guide covers altar placement and early station priorities in more detail. The key takeaway for kiln planning is that your flame altar's radius is finite, so cramming the kiln, smelter, forge and wood storage into one tight cluster early saves you from re-siting everything once you unlock the laboratory and need room for the alchemy station chain.
How to Get Charcoal and Keep the Kiln Fed
Getting charcoal in Enshrouded is straightforward once you know the recipe, but the real challenge is sustaining output. The kiln converts wood logs into charcoal at a fixed ratio, and that ratio is the number you need to plan around. Community testing suggests roughly two wood logs per charcoal, though exact yields can shift with station upgrades and patch rebalances.
The 1.0 changelog on the the changelog thread on Steam for Enshrouded notes that recipes were rebalanced to remove unnecessary resource grind, and production times for factory and cooking stations were cut. That means your kiln cycles faster than it did during early access, which changes how much wood you need stockpiled per session.
| Input | Output | Typical Ratio | Best Use |
|---|---|---|---|
| Wood Log | Charcoal | ~2:1 | Smelting ore into bars |
| Wood Log | Ash | ~4:1 | Fertilizer, alchemy base |
| Charcoal + Copper Ore | Copper Bar | 1:2 | Early weapons and tools |
| Charcoal + Iron Ore | Iron Bar | 1:3 | Mid-game armor and weapons |
A few practical habits keep the kiln productive: the ~2:1 Wood Log-to-Charcoal ratio means a single smelting run of 20 Iron Bars already demands 40+ logs, so stockpile in bulk rather than feeding the kiln one log at a time. Because the 1.0 rebalance cut station production times, the kiln now burns through that buffer faster, making a steady wood supply the real bottleneck.
-
Keep a dedicated wood chest within a few steps of the kiln so refueling is a two-second task
-
Queue charcoal before you log off, since production continues while you're away from the base
-
Batch your smelting sessions so you're not running the kiln for a single bar at a time
-
Assign a rescued survivor to the kiln once you've unlocked villager jobs, which automates part of the loop
The villager job system ties directly into this efficiency, and the survivor and NPC jobs guide explains how to put rescued NPCs to work on stations like this one. Assigning a survivor to the kiln converts it from a manual chore into a passive charcoal faucet: the NPC keeps feeding Wood Logs and collecting Charcoal while you're away from base, so the ~2:1 ratio keeps ticking without you babysitting the fuel slot. That matters most for mid-game Iron Bar production, where a 20-bar smelting run drains 40+ logs — a workload that stalls fast if you're hand-feeding the kiln between mining trips.
The Alchemy Station and Laboratory Explained
The alchemy station is where the kiln's ash output becomes genuinely valuable. This station brews potions, extracts and magical reagents, and it's the gateway to the laboratory, which handles the more advanced arcane recipes. If you're following an Enshrouded alchemy station guide, the key insight is that alchemy feeds combat sustain — healing potions, stamina brews and resistance flasks all come from here.
The laboratory sits one tier above the alchemy station and requires rarer inputs, including mined gems. The 1.0 changelog specifically mentions that mined gems were added to spell charge recipes, which makes the laboratory more relevant to spell-focused builds than it was before launch.
| Station | Primary Outputs | Key Inputs | Unlock Requirement |
|---|---|---|---|
| Alchemy Station | Healing potions, extracts, basic reagents | Herbs, ash, water | Early base tier |
| Laboratory | Spell charges, advanced reagents, gem infusions | Gems, extracts, rare herbs | Higher altar tier + survivor |
Both stations reward planning ahead. Herbs don't grow instantly, so planting a garden near your alchemy setup keeps reagents flowing without foraging trips. The laboratory's gem requirements mean you should be mining whenever you pass a deposit rather than making dedicated trips later.
A useful rule of thumb: if you're running a spell-heavy build, prioritize the laboratory upgrade over cosmetic base improvements. The gem-to-spell-charge conversion is one of the biggest power spikes available in the mid-game, and it's easy to overlook if you're focused purely on weapons.
Loom, Spinning Wheel and Tanning Station Workflow
Textile and leather production is the quiet backbone of Enshrouded's armor crafting, and the loom, spinning wheel and tanning station form a three-part chain. The spinning wheel turns raw fiber into thread, the loom weaves thread into cloth, and the tanning station converts hides into leather. Skipping any one of these leaves you unable to craft the armor sets that gate later content.
An Enshrouded loom and spinning wheel guide usually focuses on the thread-to-cloth conversion, but the tanning station deserves equal attention because leather feeds both armor and several utility recipes. The reason is material math: a single medium armor set can consume dozens of leather, and tanning one hide yields only a small batch, so a neglected tanning station quietly becomes your bottleneck long before thread or cloth runs short. Here's how the three stations relate:
-
Spinning Wheel — converts plant fiber and animal fiber into thread
-
Loom — weaves thread into cloth for robes, light armor and furnishings
-
Tanning Station — processes animal hides into leather for medium armor and bags
The tanning station pairs naturally with animal husbandry, since tamed animals provide a renewable hide supply instead of forcing you to hunt constantly. The animal husbandry guide covers taming and how to keep a steady stream of materials coming in.
| Station | Input | Output | Feeds Into |
|---|---|---|---|
| Spinning Wheel | Plant/animal fiber | Thread | Loom |
| Loom | Thread | Cloth | Light armor, furniture |
| Tanning Station | Animal hide | Leather | Medium armor, bags |
Placement tip: cluster these three stations together and near your storage, ideally within a few blocks of your kiln and cooking station so one trip covers multiple production chains. Textile crafting involves a lot of back-and-forth between stations — thread to loom, hide to tanning rack, finished goods to chests — and a tight layout saves real time over a long session. A practical benchmark: keep the spinning wheel, loom and tanning station in a single 3x3 room with a shared storage chest at the center, which cuts the walk between the thread-to-cloth handoff and the leather drop-off to a few steps instead of a full base crossing.
Cooking Station and Food Buffs for Crafting Sessions
The cooking station is easy to underestimate, but food buffs directly affect how long you can stay productive in the Shroud and how efficiently you fight while gathering. An Enshrouded cooking station guide matters because hunger and thirst in this game affect combat efficiency rather than being a hard survival timer, so a well-fed character simply performs better.
The 1.0 changelog raised cooking station yields and cut production times, which means a single cooking session now covers more playtime than it used to. That's a meaningful quality-of-life change for anyone who found food management tedious during early access.
| Food Type | Primary Buff | Best For |
|---|---|---|
| Cooked meat | Health and stamina regen | Combat and exploration |
| Vegetable dishes | Stamina efficiency | Long gathering runs |
| Mixed meals | Combined stat bonuses | Boss fights and Shroud dives |
Keep your cooking station within a few steps of your main storage chests and your kiln, since cooked meals and charcoal both feed into longer crafting sessions. This placement matters more than it looks: the kiln burns through charcoal to keep smelting batches running, and every trip across base to grab ingredients or refuel the kiln is a smelting batch sitting idle. A stocked pantry of cooked meat, vegetable dishes, and mixed meals means you're not interrupting a smelting batch to go forage for dinner, and the 1.0 yield buffs mean one session covers far more playtime. Think of food, charcoal, and storage as one production loop rather than three separate chores. If you're struggling to survive longer Shroud excursions, pairing food buffs with health upgrades makes a bigger difference than raw gear. The max health and combat guide breaks down which upgrades stack best with food bonuses.
Scaling Your Production Base Efficiently
Once all six stations are running — kiln, alchemy station, laboratory, loom, spinning wheel, tanning station and cooking station — the challenge shifts from unlocking to optimizing. A production base that's laid out well runs itself; one that isn't becomes a daily chore.
The biggest efficiency gains come from three things: proximity, automation and batching. Proximity means grouping related stations so you're not sprinting across the base every time a craft finishes — the kiln and smelter share charcoal and ore inputs, so walling them together with a chest between them cuts travel to near zero. Automation means assigning survivors to stations once villager jobs unlock, which lets the kiln keep burning charcoal and producing bricks while you're out exploring the Shroud. Batching means running large production queues rather than single-item crafts: loading 50 charcoal at once keeps the kiln's internal cycle from idling between loads, and the same logic applies to the alchemy station and laboratory, where long reagent queues beat one-off brews every time.
| Optimization | Effort | Payoff |
|---|---|---|
| Cluster related stations | Low | Less running between crafts |
| Assign survivor jobs | Medium | Passive production while away |
| Batch crafting queues | Low | Fewer idle station cycles |
| Upgrade flame altar tier | High | Faster crafting, new recipes |
A practical layout puts the kiln and smelter together, the alchemy station and laboratory together, and the textile trio together, with a central storage hub serving all three clusters. This mirrors how experienced players structure their bases, and it scales cleanly as you add more stations in later tiers.
Don't neglect the flame altar upgrade path, either. Higher altar tiers raise crafting speed across the board and unlock recipes that the base tier simply can't produce. Treating the altar as a priority upgrade rather than an afterthought pays off across every station in your base.
Frequently Asked Questions
How do I get charcoal in Enshrouded?
Build a kiln inside your flame altar's radius, then feed it wood logs. The kiln converts logs into charcoal at roughly a two-to-one ratio, and production continues while you're away from the base. Queue a large batch before logging off so your smelter always has fuel ready.
What does the alchemy station actually produce?
The alchemy station brews healing potions, stamina brews, resistance flasks and basic magical reagents using herbs, ash and water. It's the gateway to the laboratory, which handles advanced recipes like spell charges. Prioritize it if you rely on potions during combat or long Shroud expeditions.
Do I need the loom and tanning station for armor?
Yes, if you want light or medium armor sets. The spinning wheel makes thread, the loom weaves it into cloth, and the tanning station turns hides into leather. Skipping any of the three locks you out of armor tiers that gate later progression content.
Is the cooking station worth building early?
It's worth building as soon as you have spare materials. Food buffs improve combat efficiency and stamina recovery, and the 1.0 changelog raised cooking yields while cutting production times. A stocked pantry keeps long crafting and gathering sessions running without interruptions.
How many production stations should I build at once?
Build them in tiers rather than all at once. Start with the kiln and smelter, add the alchemy station and cooking station next, then expand into the laboratory and textile stations. This matches your resource income and avoids spreading materials too thin early on.
Every station in this chain exists to feed the next one, and the kiln is where that chain begins. Get charcoal flowing, keep your survivors assigned, and the rest of Embervale's crafting tree opens up far faster than it would otherwise.