
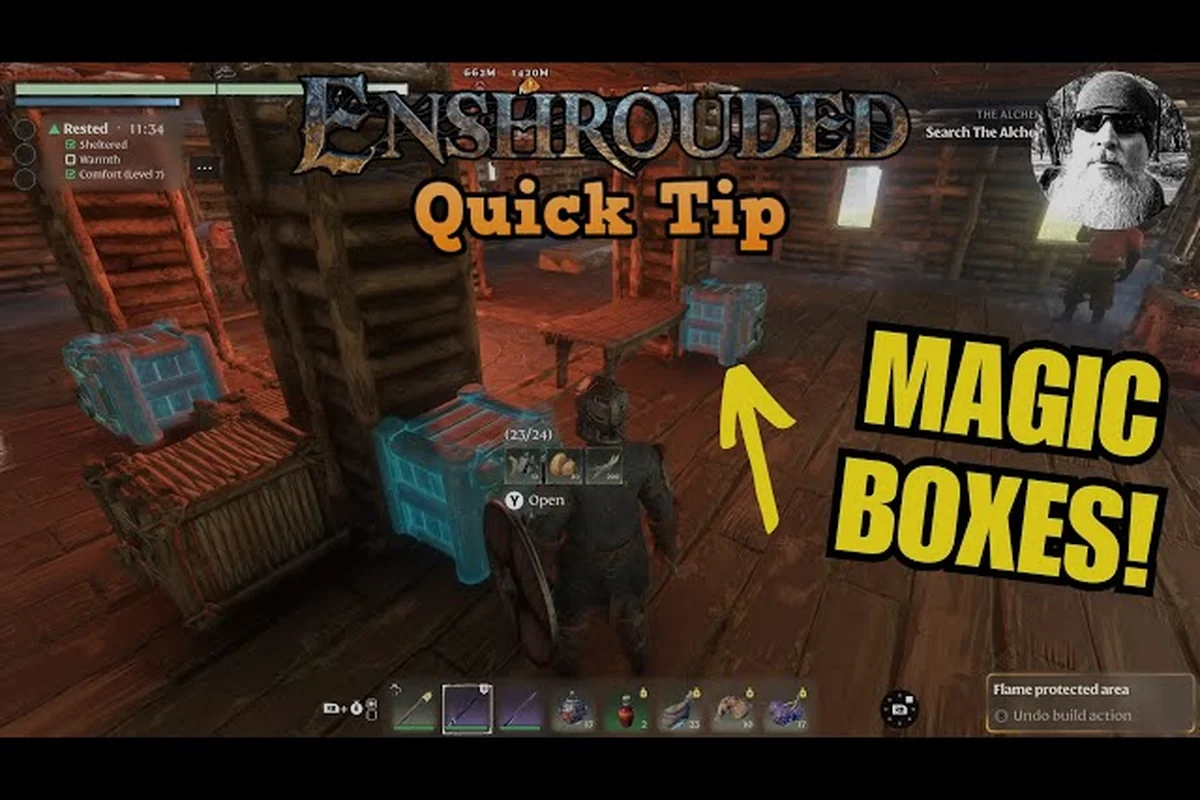
Storage is the quiet bottleneck of every Embervale base, and learning Enshrouded how to get magic chests solves it in one move. These shared containers let every crafting station pull materials automatically, so you stop running between rooms with an inventory full of ore. This guide walks through the unlock path, then covers the building blocks, roof styles, and base lighting that turn a functional shelter into a home worth keeping.
For the most up-to-date details on Magic Chests and any changes introduced in patches, you can check the Enshrouded Steam announcement archive, which document the game's current crafting and storage mechanics.
Why Magic Chests Change Base Building
A normal storage chest holds items and nothing else. A magic chest is different: once placed, its contents become available to nearby crafting stations, so the workbench, blacksmith, and alchemist can pull directly from it without you manually transferring anything. That single behavior removes the most tedious chore in base management.
The unlock is tied to progression rather than a hidden vendor. According to the official Steam page for Enshrouded, the game layers a deep skill tree over voxel-based building and free terraforming, and storage upgrades sit inside that same progression loop. You will not find a magic chest sitting in a starter ruin; you craft into it.
The gap between tiers is not just capacity — it is whether your stations can reach the chest at all. A Wooden Chest in the first hour holds a small stack count and links to nothing, so every smelt or craft means a manual trip. The Reinforced Chest, unlocked at the early crafting tier, widens capacity to a medium pool but still offers no station link, which is why many builders run two or three of them before realizing the bottleneck is access, not space. The Magic Chest is the first tier that flips the Station Link column to "Yes, shared," letting the workbench, blacksmith, and alchemist pull from one large pool simultaneously. The upgraded Magic Chest pushes capacity to very large at the late crafting tier, but the functional leap — shared access — already happened one tier earlier.
| Chest Tier | Capacity | Station Link | When It Unlocks |
|---|---|---|---|
| Wooden Chest | Small | None | First hour |
| Reinforced Chest | Medium | None | Early crafting tier |
| Magic Chest | Large | Yes, shared | Mid progression |
| Magic Chest (upgraded) | Very large | Yes, shared | Late crafting tier |
The practical payoff is that shared storage scales with your crafting ambitions. A base with four stations and one magic chest runs smoother than a base with four stations and six ordinary chests, because the stations never wait on you.
Community reports on the r/Enshrouded hub consistently flag storage as the first thing new builders underestimate, and the fix is almost always the same: push toward the magic chest tier before expanding your workshop footprint. The reasoning is mechanical, not cosmetic — because a Magic Chest links its entire inventory to every station within range, adding a second workbench or a kiln costs you nothing in logistics, whereas doing the same on a Reinforced Chest setup multiplies your manual hauling runs. That is why veteran builders treat the Magic Chest as the true gate to a multi-station workshop: it converts a base that scales linearly with chest count into one that scales with station count instead.
How to Unlock Magic Chests Step by Step
Magic chests aren't a direct craft or drop — they're the final reward in a quest chain that runs through the Blackmire and Kindlewastes regions, so you can't skip ahead by farming materials alone. The chain typically starts with the Alchemist's "Bottled Lightning" request, moves through the Hunter's wolf-hide bounty, and ends with the Carpenter's building-block delivery, meaning every step forces you to gather Shroud Wood, resin, and stone you'll already need for base construction. Because those same resources feed directly into your first proper shelter — walls, roofing, and lighting — the magic chest unlock doubles as a natural checkpoint that confirms your base is ready for the mid-game.
Rescue the Right Survivors First
Magic chests are tied to your crafting NPCs. The blacksmith and the alchemist both expand what your workbench can produce, and their arrival is what opens the higher crafting tiers. If you are still running a one-station base, the chest tier you want is simply not available yet. Rescuing survivors is its own progression track, and the order matters more than most players expect. The survivor rescue order guide breaks down which craftspeople to prioritize so your station list grows in a sensible sequence.
Gather the Materials the Recipe Demands
Once the recipe appears, the cost is real but not punishing. Expect a mix of refined wood, metal ingots, and a magical component that drops from Shroud content. The exact quantities shift with balance patches, so treat any specific number as community-tested rather than developer-confirmed.
| Step | Action | Typical Requirement |
|---|---|---|
| 1 | Rescue blacksmith and alchemist | Quest completion |
| 2 | Build the required crafting station | Refined materials |
| 3 | Farm Shroud drops | Magical component |
| 4 | Craft the magic chest | Mixed refined goods |
| 5 | Place near stations | Free placement in base |
Place It Where Stations Can Reach
Placement is the step people rush. A magic chest only helps stations within its link radius, so dropping it in a decorative corner defeats the purpose. Put it at the center of your workshop cluster, ideally against a wall so it does not block movement.
If your layout is still a work in progress, the base building guide covers how to structure a workshop zone so storage, stations, and traffic flow all line up. The key detail for magic chests specifically: their link radius is measured as a straight-line distance, not a path, so a chest placed behind a wall still reaches a Workbench on the opposite side as long as the gap stays inside the radius. That means you can tuck the chest into a recessed alcove next to your Kiln and Smelter without losing coverage, keeping the floor clear while every station in the cluster stays linked.
Choosing the Best Building Materials
Once storage is handled, the next question is what to actually build with. The best building materials in Enshrouded are not the rarest ones; they are the ones that balance durability, appearance, and how fast you can farm them in bulk.
Early on, rough stone and timber carry you through. They are abundant, they terraform cleanly, and they let you experiment with shapes without burning rare resources. Mid game, refined stone and cut wood give you cleaner lines and better structural support for multi-story builds.
| Material | Farm Difficulty | Look | Best Use |
|---|---|---|---|
| Rough Stone | Very low | Rustic | Foundations, walls |
| Timber | Low | Warm | Interior framing |
| Refined Stone | Medium | Clean | Facades, towers |
| Cut Wood | Medium | Polished | Floors, trim |
| Metal Panels | High | Industrial | Accents, roofs |
A useful rule from player experience: build the structure in cheap material first, then reskin the visible faces with the expensive stuff. You get the look you want without paying premium costs for walls nobody will ever see. In practice, that means laying rough stone foundations and interior partitions, then spending your metal panels only on the roof line and front-facing accents where the camera actually lingers. Because the Altar's build radius caps how far you can expand before you need a second Flame Altar, wasting rare mats on hidden geometry slows your whole base progression — you cannot afford to burn a full stack of metal on a wall that sits inside a mountain. Treat the table above as a budget: pair a low-difficulty material with a high-difficulty one, and reserve the expensive tier for surfaces that catch light or frame a doorway.
Material choice also interacts with lighting. Dark stone absorbs light and makes rooms feel cramped, while lighter woods and pale stone bounce light around and let you get away with fewer fixtures. That connection is why the building blocks guide and the base lighting guide are really the same conversation.
Roof Building Guide: How to Build a Roof That Works
Roofs are where voxel building gets interesting, because Enshrouded lets you shape slopes rather than snapping to a fixed set of prefab pieces. Learning how to build a roof well comes down to three things: pitch, overhang, and material weight.
Pick Your Pitch Before You Place Blocks
A shallow pitch looks sleek but sheds poorly and leaves awkward gaps at the ridge. A steep pitch reads as cozy and gives you attic space, but it eats materials fast. Most builders settle on a middle pitch for main structures and reserve steep angles for towers and accents.
Overhang Protects Your Walls
An overhang of one or two blocks keeps rain visuals off your walls and creates a natural shadow line that makes a build look intentional. It also hides the seam where wall meets roof, which is the single most common visual flaw in beginner bases.
Match Roof Material to Structure
Roof material should follow the load-bearing capacity of what sits beneath it, not the other way around. A Wood shingle roof over a starter timber hut is fine because the span is short, but the same shingles over a wide keep hall will sag without intermediate trusses. Metal roofing is the heaviest option and, as noted, demands reinforced walls underneath — which is exactly why it belongs on industrial zones and forge roofs where you have already built thick stone footings. Thatch is the lightest and cheapest, making it ideal for early huts and farm outbuildings where structural failure costs you almost nothing to repair. Match the material to the frame's strength first, then to the visual style you want.
-
Thatch for early huts and farm outbuildings
-
Wood shingle for mid-game homes and workshops
-
Slate or tile for main halls and keeps
-
Metal for industrial zones and forge roofs
Terrain shape also dictates how many Magic Chests you can realistically farm before your first major build, since steep slopes force longer roof spans and heavier material costs that eat into your early resource budget. On a flat plateau you can roof a wide hall with a single Wood shingle run and bank the saved Shroud Wood toward a second Magic Chest placement, whereas a cliffside footprint splits your roofline into staggered sections that each need their own trusses and flashing. If you are planning a larger structure with multiple wings, the best base location guide explains how terrain shape should influence where you put your rooflines before you commit to a footprint.
Base Lighting Guide for Practical Builds
Lighting in Enshrouded is not just decoration. It affects how readable your base is at night, how easy it is to navigate between stations, and how much your build photographs when you show it off. A good base lighting guide starts with function, then adds style.
Light the Paths, Not Just the Rooms
The most common mistake is lighting interiors beautifully and leaving the courtyard pitch black. Place fixtures along walkways between your entrance, workshop, and storage so you never lose your footing at night. This matters more once you start hunting magic chests: Shroud-rooted chests and hidden vaults often sit past dark courtyards, and a single misplaced step off a torch-lit path can drop you into a Shroud pocket where the fog timer drains your health before you reach the loot. Treat lighting as a navigation system, not decoration — line braziers or post lanterns every few blocks along your main routes, and keep a spare stack of wood and resin near the workbench so you can extend a path the moment you unlock a new magic chest location.
| Zone | Lighting Priority | Suggested Fixture |
|---|---|---|
| Entrance | High | Torches, braziers |
| Workshop | High | Hanging lamps |
| Storage | Medium | Wall sconces |
| Bedrooms | Low | Candles, small lamps |
| Courtyard | Medium | Post lanterns |
Use Warm and Cool Light Deliberately
Warm light makes living spaces feel inhabited, while cooler light suits workshops and forges. Mixing them in the same room usually looks accidental, so keep the split by zone. In practice, place your Magic Chests near warm-toned braziers or hearths so the glow reads as intentional storage rather than scattered clutter, and reserve cooler Blue Luminescent Blocks for crafting stations like the Blacksmith or Alchemist, where the sharper light helps you read workbench UI at night. Keeping each light source within its own building zone also prevents the washed-out look that happens when a warm hearth and a cold forge lamp overlap in a single room.
Keep Fixtures Off the Floor
Floor-level light gets blocked by furniture and crafting stations, so a torch wedged between your Blacksmith and Workbench only illuminates the two tiles it faces. Wall-mounted and hanging fixtures spread light further and keep your floor space clear for movement, which matters once your base fills up with benches and chests. This is also why the Flame Altar's base radius alone won't cut it indoors: its glow fades through walls, so a single Shroud-adjacent room can stay pitch-black even inside the altar's zone. Mount your light sources at head height on the wall above each crafting station, and you'll light the workstation and the chest stack beside it without spending a single floor tile on a lamp stand.
Tying Storage, Materials, and Light Together
The three systems in this guide reinforce each other. A magic chest keeps your stations fed, which lets you build faster, which means you spend more time on materials and lighting instead of inventory management. That is the real reason Enshrouded how to get magic chests is such a common search: it is the unlock that makes everything downstream smoother.
A practical build order looks like this: prioritize the Flame Altar upgrade that unlocks the Blacksmith and Alchemist first, since the magic chest recipe is gated behind the Alchemist's crafting tier rather than raw material gathering. Once you place that first magic chest beside your workbench, feed it stacks of Shroud Wood, Resin, and Charcoal so nearby stations pull materials automatically instead of you ferrying inventory by hand. From there, layer your base outward: shelter the crafting stations, then roof and light the structure, and only add a second magic chest once the shared one genuinely overflows with building blocks.
- Rescue the blacksmith and alchemist
- Craft and place your first magic chest near the workshop
- Build the shell in cheap material, reskin visible faces later
- Add a pitched roof with a one-block overhang
- Light walkways first, rooms second
- Expand storage only when the shared chest actually fills
Following that sequence keeps your base functional at every stage instead of forcing a rebuild later. According to the Enshrouded 1.0 changelog on Steam, Flame upgrades now also unlock the armor sets of the following crafting tier automatically, so progression mistakes are more forgiving than they used to be, and you can push your base forward without worrying that a skipped resource will lock you out of recipes permanently.
Frequently Asked Questions
How do I get a magic chest in Enshrouded?
You unlock magic chests by progressing your crafting NPCs, particularly the blacksmith and alchemist, until the recipe appears at your workbench. Then you gather refined materials plus a Shroud-sourced magical component and craft it. Place it near your stations so they can pull from it automatically.
Do magic chests share storage with all crafting stations?
They share with stations inside their link radius, not the entire world. That is why placement matters so much. Put the chest at the center of your workshop cluster rather than in a distant room, otherwise stations on the far side of your base will not see its contents.
What is the best building material for a starter base?
Rough stone and timber are the best early choices because they are abundant and cheap to replace. Build your structure in those, then reskin visible walls with refined stone or cut wood once your material income stabilizes. This keeps early experimentation low-risk.
How do I stop my roof from looking flat and boring?
Add pitch and overhang. A moderate slope with a one or two block overhang creates shadow lines and hides the wall-to-roof seam. Reserve steep angles for towers and accents, and match the roof material to the frame underneath so the structure reads as one piece.
What is the most important lighting rule for bases?
Light the paths before the rooms. Walkways between your entrance, workshop, and storage are where poor lighting actually causes problems at night. Once those are covered, add warm interior light for living spaces and cooler light for workshops to keep each zone visually distinct.