
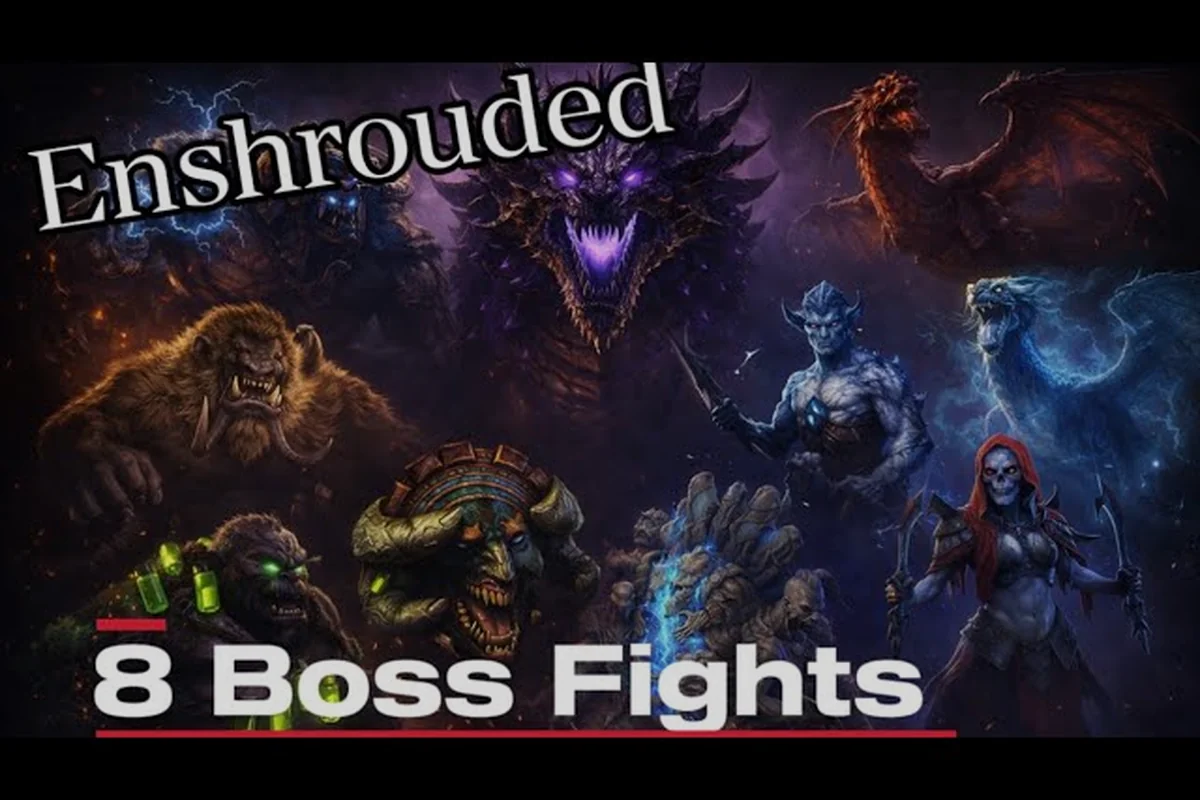
The Enshrouded boss loot table is the fastest way to decide which fights are worth your time, because each major encounter drops gear tied to a specific damage type. Knowing what falls out of a boss before you commit a Shroud timer to it changes how you build, what you craft first, and which fights you save for a full party.
Reading the Enshrouded Boss Loot Table Before You Commit
Every boss in Embervale sits behind a resource cost. You spend Shroud time, elixirs, arrows, and repair kits to reach the arena, so walking in blind means gambling those resources on a drop you may not even need. The boss loot table solves that problem by telling you the reward before the fight starts.
The table below summarizes the general reward pattern for the major encounter tiers, based on community testing and reported drops. Exact rolls vary, but the loot category is consistent: the Early Fell Cyclops reliably feeds first-legendary upgrades, the Hollow Cyclops line skews toward resistance-heavy chest pieces for tank builds, and the Albaneve Summits boss anchors endgame gear with top-tier weapons and rare runes. Flying bosses such as the Vukah-adjacent encounters invert that pattern entirely, dropping ranged weapons, feathers, and glider upgrades instead of melee gear. Treat each row as a build-filter rather than a flat reward list — the tier you farm should match the slot your character is missing.
| Boss Tier | Typical Drop Category | Notable Reward | Best For |
|---|---|---|---|
| Early Fell Cyclops | Basic weapons, shroud cores | Fell-tier weapon | First legendary upgrade |
| Hollow Cyclops | Heavy armor pieces | Resistance-heavy chest | Tank builds |
| Vukah Brawler | Melee weapons, runes | High-stagger club | Strength builds |
| Albaneve Summits boss | Endgame gear, rare runes | Top-tier weapon | Finished builds |
| Flying bosses | Ranged weapons, feathers | Glider upgrades | Mobility builds |
The pattern is deliberate: melee bosses drop melee gear, flying bosses drop ranged and traversal rewards. If you want a specific weapon, you fight the boss that drops it rather than grinding generic chests. The Vukah Brawler row is the clearest example — its high-stagger club and rune drops only roll from that encounter, so a Strength build chasing stagger should skip the Hollow Cyclops line entirely and farm the Brawler instead. Likewise, the Albaneve Summits boss is the only tier that reliably anchors top-tier weapons and rare runes, meaning finished builds should treat it as a targeted stop rather than a general grind. Match the boss to the slot you are missing, not to whatever arena happens to be closest.
A second rule matters just as much. Boss loot is not random in the way open-world chests are. Community reports suggest that each boss has a fixed loot pool with weighted rolls, so repeat kills eventually hand you every item in the pool. That makes farming a boss a reliable path to a specific piece, not a lottery.
Before you pick a target, check what your current build actually lacks. A player with strong melee but no ranged option should prioritize a flying boss, while someone stuck on a resistance wall should chase the Hollow Cyclops line. The loot table is a planning tool first and a reward list second.
The Shroud itself raises the stakes, since you can only stay inside the fog for a limited time before your character dies, and the areas hold valuable loot and regenerating treasure chests according to Enshrouded Wikipedia overview. Treating Shroud time as a spendable resource rather than a background hazard is what separates a clean boss run from a wasted one.
Resistances and Damage Types That Decide Every Fight
Resistances and damage types are the hidden math behind every Enshrouded boss fight, and ignoring them is the most common reason players hit a wall. A weapon that shreds trash mobs can deal almost nothing to a boss with the wrong resistance profile.
Damage in Enshrouded splits into physical and elemental channels. Physical covers slashing, piercing, and blunt, while elemental covers fire, ice, and shock. Bosses carry different resistance values against each channel, so the same sword can feel overpowered in one arena and useless in the next.
| Damage Type | Strong Against | Weak Against | Common Source |
|---|---|---|---|
| Slashing | Fleshy Fell enemies | Armored Hollow | Swords, axes |
| Piercing | Unarmored targets | Heavy plate | Bows, spears |
| Blunt | Armored and staggered foes | Fast flyers | Maces, hammers |
| Fire | Hollow and plant enemies | Fire-resistant bosses | Torches, fire spells |
| Ice | Slow, heavy targets | Ice-immune bosses | Frost weapons |
| Shock | Mechanical and metal foes | Grounded brutes | Shock staves |
The practical takeaway is to carry at least two damage types into any boss attempt, because Enshrouded's resistance values are flat multipliers rather than small nudges — a pure-fire build running a Fireball-heavy battlemage loadout can watch its damage fall off a cliff the moment it meets a fire-resistant boss like a Hollow brute variant, while a mixed loadout of fire plus a shock staff or blunt mace keeps pressure on through every phase. This matters directly for your boss loot table farming, since longer kill times mean fewer clears per session and fewer rolls at the rare drops you're actually chasing.
Resistance also works in reverse. Bosses deal a dominant damage type, and your armor's resistance values reduce it. If a boss hits hard with shock, stacking shock resistance on your chest and legs cuts incoming damage far more than raw armor rating does. Players who die repeatedly to one boss usually have the wrong resistance profile rather than too little health.
Elemental damage scales with your skill tree, so a battlemage investing in fire nodes gets more value from a fire weapon than a ranger would. Match your damage type to your invested nodes, then match the boss's weakness to that type. When those two line up, kill times drop dramatically.
Understanding how stagger and stun interact with these damage types matters too, and the boss stun meter breakdown explains how heavy hits build toward a stagger window you can punish. Blunt weapons fill the stagger meter fastest against armored bosses, while shock damage chains through metal-plated foes like the Hollow brute variant, so pairing a blunt mace with a shock staff lets you force a stagger, then dump your highest-damage elemental skill into the exposed window. Skipping this synergy is why many players stall on the enshrouded hardest boss encounters — every extra minute spent chipping a resistant health bar is one fewer roll on the boss loot table, and rare drops like legendary weapon schematics only enter the pool on a completed kill.
How to Test a Boss's Weakness Quickly
You do not need a wiki open mid-fight to find a weakness. Land one hit with each damage type you carry and watch the damage numbers. The channel that produces the largest number is your answer, and it usually becomes obvious within the first ten seconds of an encounter.
Keep a backup weapon of a different type in your quick slots so you can swap without opening menus. This habit alone saves more runs than any single gear upgrade, because it lets you adapt the moment a resistance wall appears.
Grounding Flying Bosses and Aerial Enemies
Flying enemies break the melee rhythm that works on everything else, and the game gives you several tools to bring them down. The grappling hook and glider are traversal items first, but they double as aerial combat enablers when a boss refuses to land.
The core problem with flyers is uptime. A grounded boss lets you attack constantly, while a flyer forces you to wait for dive windows. Every second spent waiting is a second your Shroud timer burns and your damage output sits at zero.
| Tool | How It Helps | When to Use |
|---|---|---|
| Grappling hook | Pulls you toward airborne targets | Closing distance fast |
| Glider | Lets you chase during dives | Repositioning mid-air |
| Ranged weapons | Damage without chasing | Sustained chip damage |
| Shock damage | Interrupts flight patterns | Forcing a landing |
| Terrain cover | Blocks dive attacks | Surviving strafe runs |
The most reliable strategy is to force the flyer into a predictable pattern. Shock damage and heavy blunt hits can interrupt flight, and a grounded flyer is a dead flyer. Stack ranged pressure while it circles, then burst it the moment it lands.
Positioning matters as much as damage. Standing near a wall or under an overhang limits the angles a flyer can attack from, which turns an unpredictable aerial duel into a manageable ground fight. Players who beat flying bosses consistently fight them in tight spaces rather than open fields.
If you are still learning the movement tools, the Hourglass Capsule and Shroud survival guide covers the traversal and resource basics that make aerial chases far less punishing. Prioritize the Grappling Hook upgrade that extends pull range before farming flyers, since the base hook often falls short of a diving Fell boss and leaves you hanging mid-air as a free target. Pair it with a stamina-efficient Glider so you can hold altitude through a full strafe run instead of dropping into the dive arc, then slot Shock damage on your secondary to interrupt flight and force the landing window you actually want to punish.
Ranged Build Priorities for Aerial Fights
A ranger build trivializes most flyers because it never needs to chase. Prioritize draw speed and stamina efficiency over raw damage, since you will fire many shots at a moving target and run out of stamina long before you run out of arrows.
Carry a backup melee weapon for the landing window, because flyers like the Fell Wisp and Vukah aerial variants only become vulnerable to stagger during the brief seconds their feet touch ground. The moment a flyer touches down, swap and dump your heaviest combo into it — a two-handed weapon with high stagger power can interrupt the takeoff animation entirely, buying you a free follow-up volley — then swap back to ranged as it lifts off again. Skipping this swap means you rely purely on projectile DPS, which drags the fight out and increases the odds you exhaust stamina before the kill, especially against bosses whose loot table only drops on a clean, no-death clear.
How to Beat the Fell and Their Toughest Variants
Learning how to beat the Fell starts with understanding that this faction rewards patience over aggression. Fell enemies hit hard, recover quickly, and punish greedy combos, so the fight is won by reading attack tells rather than out-damaging them. The Fell Cyclops is the classic example. It telegraphs a slow overhead slam, and that wind-up is your invitation to strike. Hit twice, then back off before the follow-up sweep. Players who try to land a full combo eat the sweep and lose half their health.
| Fell Variant | Key Tell | Safe Punish Window | Recommended Damage |
|---|---|---|---|
| Fell Cyclops | Overhead slam wind-up | After slam lands | Blunt or slashing |
| Hollow Cyclops | Charge stance | After charge stops | Piercing |
| Elite Fell | Roar animation | During recovery | Any elemental |
| Shrouded Fell | Glow pulse | After pulse fades | Fire |
The hardest boss in the game, widely reported as the Albaneve Summits encounter, combines everything above: high resistances, punishing tells, and a long fight that drains your supplies. Beating it requires a tuned build, correct damage types, and full resistance gear rather than a single trick.
Preparation beats reflexes here. Bring extra elixirs, repair your gear before entering, and clear the arena approach so you are not fighting adds mid-boss. A full party of four spreads aggro and shortens the fight, which matters when Shroud time is limited.
For a broader look at the faction roster and how each enemy type behaves, the Hollow and Scavenger enemies breakdown maps the tells and weaknesses across the bestiary. That reference matters for loot farming because the Fell variants above drop different tables: the Fell Cyclops and Elite Fell feed the mid-tier boss loot table, while the Shrouded Fell's fire weakness ties into resistance-gated drops you will only see once your damage type matches. Cross-checking tells against drop sources stops you from farming the wrong variant for a specific material.
Building a Fell-Counter Loadout
A dedicated anti-Fell loadout leans on blunt weapons for stagger, fire for the Shrouded variants, and resistance gear tuned to the boss's dominant damage type. Swap your chest piece if the resistance profile is wrong, even if it costs you armor rating.
Practice the punish rhythm on weaker Fell before attempting the elite versions. The timing carries over directly, so the muscle memory you build on a basic Cyclops pays off against the hardest encounter in the game. Treat the early Cyclops fights as a free lab for the exact windows that matter at the top end: the overhead slam leaves a recovery gap long enough for two blunt swings, while the sweeping backhand only opens a single-hit punish before the next wind-up begins. Because the elite Fell variants share these same telegraph animations but compress the recovery frames, a player who has drilled the Cyclops pattern can read the shorter window on sight instead of eating a counter. That transfer is why farming the basic Cyclops early doubles as loot-table prep — you learn which stagger breakpoints actually interrupt a wind-up, so when the elite version finally drops its signature gear, you are already holding the timing needed to survive the kill.
Planning Boss Runs Around Shroud Time and Loot
Efficient boss farming is a logistics problem as much as a combat one. The 1.0 changelog notes that enemies now recover health over time when players leave the combat area instead of resetting instantly, which gives a party an advantage when re-engaging a boss right after a wipe according to Keen Games' Steam announcements for Enshrouded.
That change rewards persistence. Instead of a full reset, a wiped party can regroup, heal, and re-enter while the boss is still damaged, preserving progress on the health bar that would otherwise vanish. The key is timing: enemies only begin regenerating once you leave the combat area, so a quick regroup at the arena edge keeps the boss at its current phase and lets you finish the kill before the Shroud timer forces extraction. Plan your attempts around this window rather than retreating all the way to a base, where the trek back costs Shroud time and risks losing the loot you already earned.
| Run Phase | Goal | Time Cost | Priority |
|---|---|---|---|
| Prep | Repair, restock elixirs | Low | Always |
| Approach | Clear adds quietly | Medium | Skip if possible |
| Fight | Burn boss phases | High | Core objective |
| Loot | Grab drops, check chests | Low | Never skip |
| Extract | Leave before Shroud kills you | Medium | Non-negotiable |
The extraction step is where most players lose their loot. Dying inside the Shroud after a kill can cost you the drop entirely, so leave the moment the boss falls and your inventory is full. The Shroud timer does not pause for looting, so every second spent sorting through chests is a second drained from your escape window. Prioritize the boss's guaranteed drop over optional chests, and if you are farming a specific piece from the loot table, confirm it landed in your inventory before you start opening side containers. A full inventory mid-fight is a common failure point, so clear two or three slots before engaging and assign one co-op player to loot while the rest cover the exit.
Stack multiple objectives into one run when you can. If a boss arena sits near a Shroud root or a chest cluster, clear those on the way out so a single Shroud timer covers several rewards. The full boss list and order guide helps you sequence encounters so you are not backtracking across the map for a single drop.
Co-op changes the math further, since a party of up to sixteen players can split roles. One player tanks, others deal elemental damage, and a support keeps elixirs flowing. Coordinated groups clear bosses faster and lose fewer drops to Shroud timers.
Matching Drops to Your Build Path
The final step is turning loot into progression. A boss drop is only valuable if it fits your build, so read the loot table against your skill tree before you farm. A strength build chasing a ranger weapon wastes hours it could spend on the right fight.
Prioritize drops that unlock a new damage type you lack. If you have no shock source, a shock weapon from a boss opens up entire enemy categories you previously struggled against. Broadening your damage coverage matters more than stacking raw numbers on one weapon.
Upgrade the drops you keep. Boss weapons scale with crafting upgrades, so a mid-tier drop fully upgraded often beats a higher-tier drop left unleveled — a +5 Fell Thunderbrute weapon can out-damage a +0 drop from the Hollow Halls' later bosses against the same target. Spend your rare materials on the weapon you actually use in boss fights, and check the loot table's upgrade costs before committing: some boss drops demand Shroud cores or legendary shards that are far harder to farm than the weapon's base damage gap suggests.
Track which bosses you have cleared and which drops remain, because the loot table is per-boss and does not tell you what you already own. A simple checklist prevents repeat farming for an item you already have — and in Enshrouded, that matters more than in most games, since the Shroud timer, not the boss, is your real constraint. Every extra run against a cleared boss such as the Fell Thunderbrute costs Shroud survival time you could spend on an uncleared encounter like the Hollow Halls' later fights, which still gate unique drops. Note the exact drop name and its source boss on your list; several bosses share overlapping loot pools, so a "shock weapon" you think you still need may already be sitting in your inventory from a different kill. Update the list after each clear, and cross-reference it against the loot table before you commit to a farming route, so your Shroud time always goes to encounters that still have something to give you.
Frequently Asked Questions
What does the Enshrouded boss loot table actually show?
It shows the reward pool tied to each major boss, grouped by tier and drop category. Because each boss has a fixed pool with weighted rolls, repeat kills eventually yield every item, which makes targeted farming reliable rather than random. Use it to pick fights that fill gaps in your current build.
Which is the hardest boss in Enshrouded?
Community reports consistently point to the Albaneve Summits encounter as the hardest fight, because it combines high resistances, punishing attack tells, and a long attrition phase. Beating it demands correct damage types, full resistance gear, and a repaired loadout before you enter the arena.
How do resistances and damage types change a boss fight?
Bosses carry resistance values against physical and elemental channels, so the same weapon can deal heavy damage to one boss and almost nothing to another. Carry at least two damage types, test which channel produces the biggest numbers, and swap weapons the moment a resistance wall appears.
How do I fight flying enemies without a ranged build?
Use the grappling hook to close distance and the glider to chase during dives, then force a landing with shock or heavy blunt hits. Fighting near walls and overhangs limits their attack angles, turning an unpredictable aerial duel into a manageable ground fight you can punish.
Is it worth farming the same boss repeatedly?
Yes, if the boss drops something your build needs. Fixed loot pools mean persistence pays off, and the 1.0 change to enemy health recovery lets a wiped party re-engage a damaged boss instead of starting over, which shortens each farming cycle considerably.