
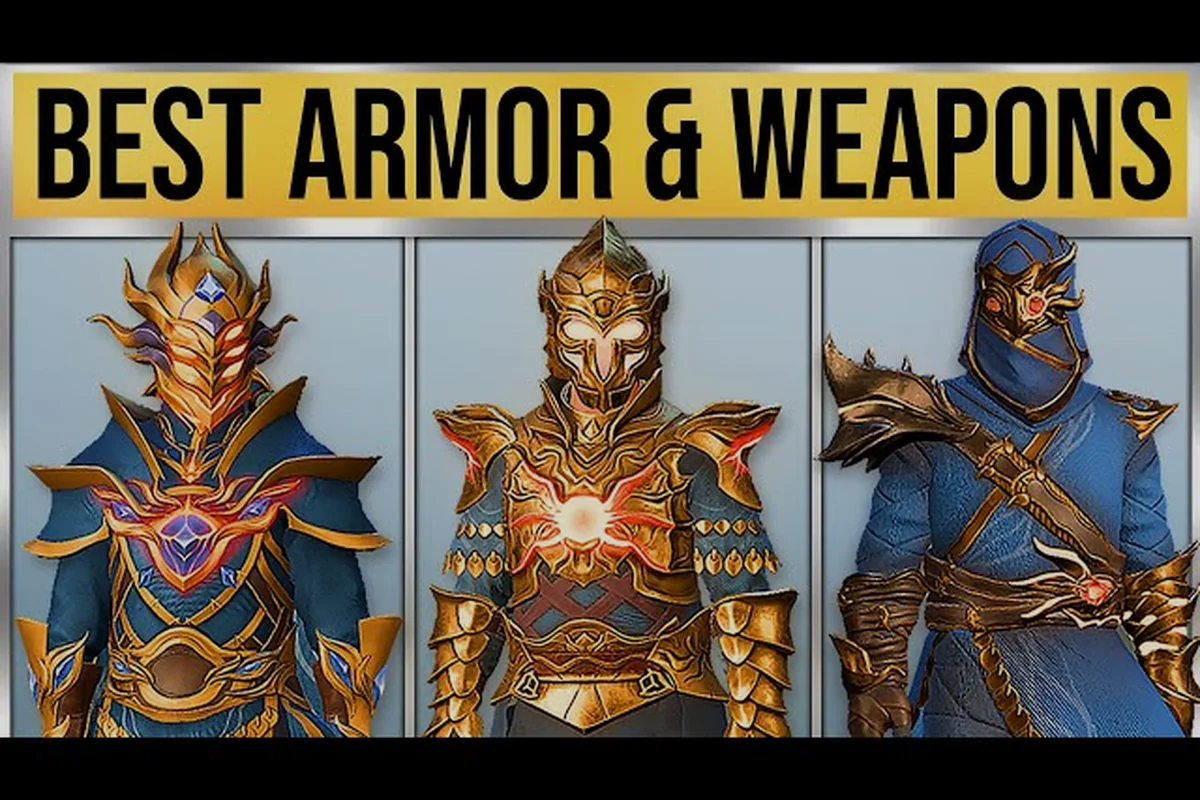
Armor decides whether your Flameborn survives a Shroud run or dies three steps from a flame altar, and this Enshrouded armor sets guide breaks down every class pick worth farming. Since 1.0 raised the legendary drop chance on chests by 5%, the endgame gear conversation has changed completely.
How Armor Tiers and Set Bonuses Work in Enshrouded
Every armor piece in Embervale carries an armor value, a rarity tier, and often a set bonus that only activates when you wear matching pieces. Understanding that hierarchy matters more than chasing a single high-number chest plate, because a coordinated set usually outperforms a random pile of stronger individual items.
Armor rarity climbs through common, rare, epic, and legendary tiers. Higher tiers roll more affixes, and those affixes are where your real power lives — a legendary chest with the wrong stats can be worse than an epic chest that matches your build. The official Steam page describes Enshrouded as a survival action RPG with a deep skill tree split across juggernaut, ranger, and battlemage paths, and armor is designed to reinforce those same three identities.
Set bonuses typically reward you for committing to a theme. Wearing three or four pieces of a matching set unlocks passive effects like extra stamina regeneration, bonus spell damage, or improved critical chance. Mixing two different sets can work, but you usually lose the top-tier bonus, so most players pick one primary set and fill gaps with high-roll singles.
Here is how the four rarity tiers compare in practice: common pieces roll 0-1 affixes and carry no set bonus at all, making them pure filler you should replace by level 5. Rare gear adds 1-2 affixes and unlocks partial 2-piece bonuses, which is the first point where matching two slots actually pays off. Epic armor rolls 2-3 affixes and enables the full 3-4 piece set bonus, so this is the tier where a committed build (juggernaut, ranger, or battlemage) starts to snowball. Legendary pieces push to 3-4 affixes plus a unique perk no other tier can roll, which is why a single legendary chest can outweigh an entire epic set for the right build.
| Rarity | Typical Affix Count | Set Bonus | Where It Drops |
|---|---|---|---|
| Common | 0-1 | None | Early Shroud chests, tutorial areas |
| Rare | 1-2 | Partial (2-piece) | Silver chests, Revelwood |
| Epic | 2-3 | Full (3-4 piece) | Silver and gold chests, mid-game |
| Legendary | 3-4 | Full + unique perk | Gold chests, boss rewards |
The jump from epic to legendary is the single biggest power spike in the game, which is exactly why the 1.0 loot changes matter so much. According to the the Enshrouded changelog on Steam, the chance for legendary items rose by 5% across all chests, common-tier loot was removed from silver chest lists, and wooden chests can now roll a weapon or armor piece at silver-chest level. In plain terms: your farming routes are now more rewarding at every stage.
If you are still sorting out your broader loadout, the weapons guide pairs naturally with armor planning, since weapon scaling and armor affixes should reinforce the same stat. A battlemage running a fireball staff, for example, wants epic or legendary armor rolling intelligence and spell critical chance rather than strength, while a ranger stacking dexterity gets almost nothing from a juggernaut set's stamina bonuses. Cross-check your weapon's primary scaling attribute against your set's affix pool before you commit to farming a full 4-piece — a mismatched legendary chest can drag your effective damage below an epic piece that actually feeds your build.
The Best Armor for Warriors and Melee Builds
Warriors live and die by armor value and stamina efficiency, because a melee fighter eats hits that a ranged player never sees. The best armor for warriors stacks physical resistance, boosts health, and keeps your stamina pool deep enough to block, dodge, and swing without running dry mid-combo.
The juggernaut branch of the skill tree rewards players who stand their ground, so your gear should lean into that identity. Look for pieces with +Health, +Armor, and Stamina Regeneration affixes. A warrior set that ignores stamina will feel great for ten seconds and then leave you helpless against a Brute's enrage window.
For a melee tank, affix priority should follow damage-mitigation math rather than raw stat totals: +Armor Value carries the most weight because it scales against every physical hit, while +Max Health only buys you time between heals. Stack Stamina Regeneration on at least two pieces so your block and dodge stay online through a Brute's enrage window, and treat Physical Resistance as a multiplier layered on top of armor — not a replacement for it. Thorns or Reflect rolls are a bonus, not a build foundation, since they scale off the damage you absorb rather than the damage you deal.
-
+Armor Value — your primary damage mitigation stat, scales with every hit you take
-
+Max Health — raw buffer so one bad dodge does not end the run
-
Stamina Regeneration — keeps block and dodge available during long fights
-
Physical Resistance — reduces incoming melee and ranged damage from most enemies
-
Thorns or Reflect — niche but strong when you are surrounded
For a warrior, the practical goal is a full legendary set with at least three defensive affixes per piece. Do not chase offensive rolls on your chest and legs — those slots should be pure survivability, and your weapon handles the damage. A common mistake is wearing a glass-cannon set into the Shroud and wondering why the fog timer feels so short; the answer is usually that you are spending health instead of armor. Melee builds also benefit enormously from the rested buff, since stamina and health regeneration both scale with it. The sleep and rested buff guide explains how to keep that buff active before every serious expedition.
| Warrior Slot | Best Affix Priority | Why It Matters |
|---|---|---|
| Helmet | +Armor, +Health | Head hits are common in melee |
| Chest | +Armor, Physical Resistance | Largest armor contribution |
| Legs | +Health, Stamina Regen | Survives burst damage |
| Gloves | +Armor, Thorns | Cheap defensive value |
| Boots | Stamina Regen, Movement | Dodge and repositioning |
The Best Armor for Mages and Spellcasters
Mages trade raw armor for mana, spell damage, and casting efficiency, which makes the best armor for mages a very different animal from a warrior set. The battlemage skill path amplifies spell output, and your gear should push that multiplier even higher while keeping enough defense to survive a stray hit.
The core stats a caster wants are +Intelligence, +Mana, Mana Regeneration, and +Spell Damage. Intelligence usually feeds both your damage and your mana pool, so it is the single most valuable affix on a mage piece. A legendary robe with high Intelligence and Mana Regeneration can carry an entire build.
What to prioritize on a caster set: lock in +Intelligence first, since it double-dips into spell damage and mana pool on the same affix, then layer Mana Regeneration so your DPS does not collapse mid-fight when the mana bar empties. A concrete benchmark is the Eternal Fireball and Eternal Ice Bolt staves — both roll spell damage and elemental affixes that scale harder than raw armor ever will, so a caster stacking Intelligence plus Mana Regen on a legendary robe will out-damage a mage wearing heavier plate with no spell affixes, even before the battlemage skill path multiplier kicks in.
-
+Intelligence — scales spell damage and mana simultaneously
-
+Max Mana — more casts before you need to retreat
-
Mana Regeneration — sustains long boss fights without potions
-
+Spell Damage — direct multiplier on every offensive spell
-
Elemental Resistance — covers the mage's weak physical defense
Mages should accept lower armor values as a tradeoff, but never skip defense entirely. The Shroud does not care how much damage you deal if you die to chip damage before the boss appears. A balanced caster set keeps two defensive affixes across the full loadout while stacking offense everywhere else.
Spell selection interacts directly with your armor rolls. If your set boosts fire damage but you are running frost spells, you are wasting affixes. The spells list is worth reviewing before you commit to a themed caster set, since matching your element to your gear is where mage builds find their real ceiling.
| Mage Slot | Best Affix Priority | Why It Matters |
|---|---|---|
| Helmet | +Intelligence, +Mana | Cheap offensive scaling |
| Chest | +Spell Damage, Elemental Resistance | Balances offense and survival |
| Legs | +Mana, Mana Regen | Sustains long encounters |
| Gloves | +Spell Damage, +Intelligence | Highest damage slot |
| Boots | Mana Regen, Movement | Kiting and repositioning |
The Best Armor for Rangers and Bow Builds
Rangers want critical chance, attack speed, and stamina, because the best armor for rangers is built around landing fast, precise hits from range. A ranger who runs out of stamina cannot draw a bow, and a ranger without crit chance leaves enormous damage on the table.
The ranger skill branch rewards mobility and precision, so your armor should amplify both. Prioritize +Critical Chance, +Critical Damage, +Stamina, and +Ranged Damage affixes. Dexterity-style stats usually feed crit and attack speed, making them the backbone of any serious bow build.
Ranger affix priorities: stack +Critical Chance first, since it gates every other multiplier in the build, then layer +Critical Damage to convert that crit rate into real burst. +Stamina matters more than raw armor here — each bow draw and dodge roll drains the same pool, so a ranger who bottoms out mid-fight stops dealing damage entirely. Round the set out with +Ranged Damage for flat arrow scaling and a single Movement Speed roll to keep kiting distance, since Enshrouded's lighter armor tiers trade physical resistance for the mobility that keeps melee enemies from ever closing the gap.
-
+Critical Chance — the foundation of every ranged damage build
-
+Critical Damage — multiplies the value of your crit chance
-
+Stamina — more draws, more dodges, more uptime
-
+Ranged Damage — flat boost to every arrow
-
Movement Speed — keeps you out of melee range
Rangers can afford lighter armor than warriors because distance is their defense. That said, a full glass build collapses the moment an enemy closes the gap, so keeping one or two defensive affixes on your chest and legs is smart. The goal is a set that lets you kite indefinitely while crits stack up.
Bow and dagger builds share a lot of stat overlap, and the daggers and bows guide covers how to align your weapon choice with the same crit-focused affixes your armor provides. The reason the overlap matters is that both weapon types scale off Dexterity, so a single +Critical Chance and +Critical Damage roll on your gloves or helmet feeds your dagger backstabs and your bow shots simultaneously — you are not splitting your gear budget between two damage profiles. If you swap between a bow for opening engagements and daggers for finishing off staggered enemies, keep your +Stamina rolls high enough to cover both a full draw and a dodge-roll chain, since the two weapons drain the same pool. Building one crit-and-stamina set that serves both playstyles is far more efficient than farming two separate armor sets in the Enshrouded crafting tiers.
| Ranger Slot | Best Affix Priority | Why It Matters |
|---|---|---|
| Helmet | +Crit Chance, +Stamina | Feeds your damage engine |
| Chest | +Ranged Damage, Light Armor | Offense with a safety net |
| Legs | +Crit Damage, Movement | Burst and mobility |
| Gloves | +Crit Chance, Attack Speed | Highest DPS slot |
| Boots | +Stamina, Movement Speed | Kiting and repositioning |
Farming Legendary Armor After the 1.0 Loot Changes
The 1.0 update reshaped how you farm legendary armor, and the changes favor players who plan efficient chest routes. The official Enshrouded news page tracks these patch notes, and the headline numbers are worth internalizing before you spend hours farming.
Three changes matter most for armor hunters. First, the legendary chance on all chests rose by 5%, so every chest you open is more likely to pay off. Second, common-tier loot was removed from silver chest lists, meaning silver chests now only roll rare or better gear. Third, wooden chests can now roll a weapon or armor piece at silver-chest level, which turns early-game containers into genuine upgrade sources.
A practical farming loop looks like this: start at the Springlands fast-travel spire, clear the wooden chests around Longkeep and the Revelwood border for silver-tier rolls, then push into the Kindlewastes silver chest clusters before finishing on the gold chests in the Shroud. Log each chest on your map, because respawns follow a set timer tied to resting at your Flame Altar — roughly one in-game day — so a route you can run in under ten minutes is worth more than a scattered sweep.
-
Clear gold chests first — highest legendary odds and best affix rolls
-
Sweep silver chests on the way — no more common-tier junk to dilute results
-
Open wooden chests in Springlands and Revelwood — more chests were added there to reward early exploration
-
Bank gold coins — they were added to loot chests across Embervale and became part of the Springlands material set
-
Reset and repeat — chests respawn, so a memorized route beats random wandering
Because more loot chests were placed in Springlands and Revelwood, early and mid-game players now have a smoother path to their first legendary set. You no longer need to reach the deepest Shroud zones before your gear feels competitive.
| Farm Location | Chest Type | Best For | Legendary Odds |
|---|---|---|---|
| Springlands | Wooden | First upgrades | Low but improved |
| Revelwood | Silver | Mid-game sets | Moderate |
| Shroud zones | Gold | Endgame legendaries | Highest |
| Boss arenas | Reward chests | Guaranteed epics+ | High |
Reading Affix Rolls and Avoiding Wasted Gear
A legendary armor piece is only legendary if its affixes match your build. The most common endgame mistake is equipping a high-rarity item that boosts the wrong stats, then wondering why your damage or survivability did not improve. Affix quality beats rarity every time.
When you inspect a drop, ask three questions. Does it boost my primary stat? Does it reinforce my set bonus? Does it replace a weaker affix on my current piece? If the answer to any of these is no, the item is vendor fodder regardless of its color.
Use this five-point filter before you commit resources to any drop: primary stat match (Intelligence for mages, Armor for warriors, Crit for rangers), set bonus check (does it complete or extend your active set?), affix count (more affixes generally means more total value), slot fit (chest and legs carry defense, gloves and helmet carry offense), and the upgrade test (compare directly against your equipped piece, not in isolation). A legendary chest with three defensive affixes is dead weight on a ranger stacking Crit, while a lower-rarity piece with the right primary stat and two matching affixes can outperform it outright. Run every candidate through all five checks before you spend upgrade materials.
-
Primary stat match — Intelligence for mages, Armor for warriors, Crit for rangers
-
Set bonus check — does it complete or extend your active set?
-
Affix count — more affixes generally means more total value
-
Slot fit — chest and legs carry defense, gloves and helmet carry offense
-
Upgrade test — compare directly against your equipped piece, not in isolation
Community reports suggest that players who reroll or refarm for correct affixes see a bigger power jump than players who simply chase the highest armor number. The math backs this up: a legendary chest with three defensive affixes on a Crit-stacking ranger contributes almost nothing to damage output, while a blue or purple piece with +Crit and a matching set bonus can add more effective DPS than a full tier of raw armor rating. This is why the Upgrade test matters more than the rarity color — compare affix-by-affix against your equipped piece, because a single wasted affix slot on a legendary often costs more total value than the rarity downgrade itself. Treat every legendary as a starting point, not a finished product: reroll the wrong stat before you spend upgrade materials, and only commit resources once the affix set actually serves your build.
Frequently Asked Questions
What is the best armor in Enshrouded overall?
There is no single best set, because the strongest armor depends on your class. Warriors want high armor value and stamina regeneration, mages want Intelligence and mana, and rangers want critical chance and ranged damage. A full legendary set with class-matched affixes beats any mismatched high-rarity piece.
Is the best armor for mages worth the lower defense?
Yes, as long as you keep one or two defensive affixes across your loadout. Mages trade armor for spell damage and mana, and the battlemage skill path rewards that tradeoff. Just avoid a fully glass build, since chip damage in the Shroud can still end a run.
How do I get legendary armor faster after 1.0?
Farm gold chests first, then sweep silver and wooden chests on the same route. The 1.0 changelog raised legendary drop chance by 5% and removed common-tier loot from silver chests, so every chest is more efficient. Memorize a respawning route and repeat it.
Can I mix armor sets from different classes?
You can, but you usually lose the top-tier set bonus, which is often the strongest part of a set. Mixing works best when you keep at least the 2-piece or 3-piece threshold of your primary set and fill the remaining slots with high-roll singles that match your stats.
Does armor matter in the Shroud?
Absolutely. The Shroud limits how long you can stay inside before dying, and armor reduces the chip damage you take while exploring. Higher armor value and elemental resistance extend your effective time in the fog, which is why defensive affixes are never wasted even on offensive builds.
Final Thoughts on Building Your Armor Set
The right armor set turns a fragile Flameborn into a class specialist, and this Enshrouded armor sets guide gives you the framework to build one. Match your affixes to your skill path, commit to a set bonus, and farm the chest routes that 1.0 made more rewarding. Whether you are chasing the best armor for warriors, mages, or rangers, the winning formula is the same: correct stats first, rarity second, and a memorized farming loop to tie it together.